VPN is very important service nowadays. The possibility to connect to remote network is very powerful feature used by single user accessing files at home to thousands of business users working remotely with applications and services available previously only on their desktops in the office. Because of that there are many alternative on the market providing such service. In this post I will focus on the OpenVPN running on the new version of pfSense 2.0 RC1. The goal is to compare the new features with the capabilities of the older 1.2.3 version.
One of the reasons choosing OpenVPN was for the rich feature set, small system requirements the level of control. You can easily setup is up on virtual machine or on SoHo router. The possibility to authenticate users not by insecure usernames and passwords, but by certificates was very compelling.
On 1.2.3 version of pfSense, instead of generating the certificates on the router, I was generating them on a Windows Machine. Following guidance from this sources:
After generating all the required certificates, it was just a matter of copy / paste in the configuration.
In the new 2.0 version of pfSense there is a Cert Manager. Using it you can manage your certificate on the box, not just pasting pre-generated certificates.
The other new feature that we will use is User Manager. You have three options for central location of your users: local database, LDAP and RADIUS.For this post we will use local database, as it is the easiest way.
As a first step, let’s install the “OpenVPN Client Export Utility” package, from System > Packages. We will need it later.
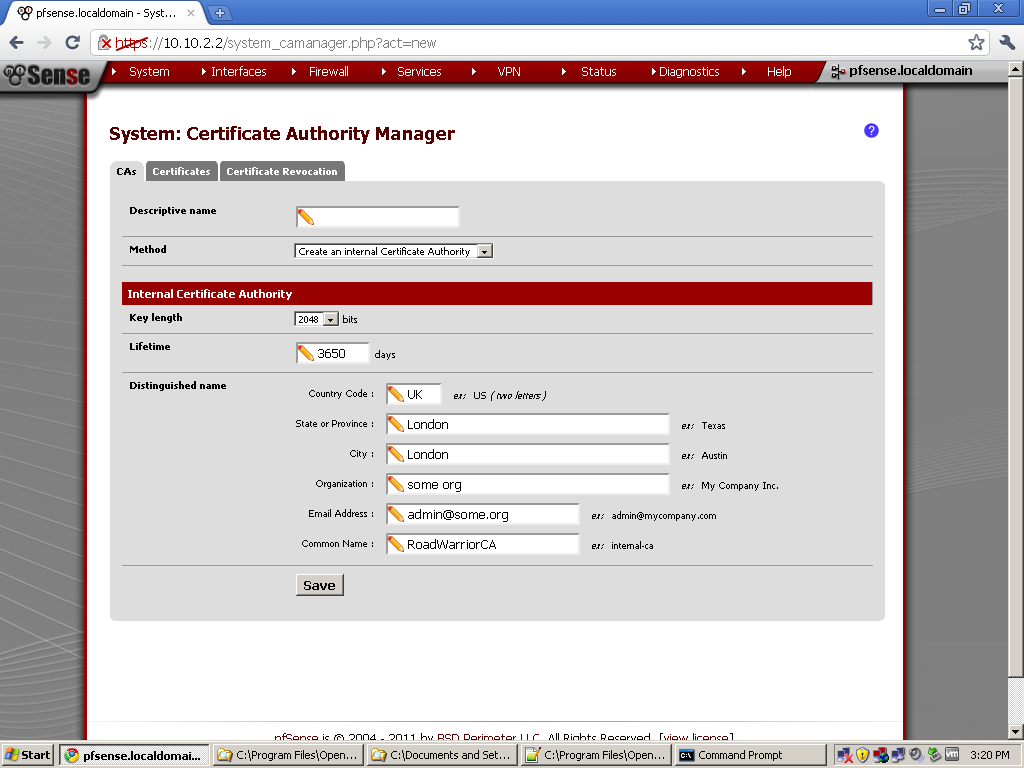
Then go to System > Cert Management. On the CA (Certificate Authority) leaf, create new one. Take a note of the Descriptive and Common names you give it, we will need them later. Enter the rest of the details for the CA.

Now under System > User Management, create new user account. Tick in the Certificate section “Click to create a user certificate.”, or after the user is created, enter the newly created user account and generate a certificate for the user. As a Method select “Create an Internal Certificate”, enter the Distinguished name details.
 Tick in the Certificate section “Click to create a user certificate.”, or after the user is created, enter the newly created user account and generate a certificate for the user. As a Method select “Create an Internal Certificate”, enter the Distinguished name details.
Now is time to configure the OpneVPN server. Go under VPN > OpenVPN, select the Wizardleaf.
For type of Server, select Local User Access
For Certificate Authority Select the name of the one we created earlier, in our case Road Warrior CA
For Server Certificate, select Add New Certificate, type in something memorable for Descriptive name, because we will use it right away.

Now edit the configuration of the OpenVPN server. On this page you can enable TLS.
Select the size of DH, Encryption Algorithm. for Tunnel Network choose a subnet that different from your LAN subnet. In the Local Network enter your LAN subnet. Decide on the number of Concurrent Connections, and if you want to use compression.
for Tunnel Network choose a subnet that different from your LAN subnet. In the Local Network enter your LAN subnet. Decide on the number of Concurrent Connections, and if you want to use compression.As this is a very basic configuration, we won’t enter DNS servers, and Default Domain, but you should consider these options, depending on your environment.
Now go to VPN > OpenVPN, select the Client Export leaf. The package that we have installed in the beginning gives us the possibility to automatically export archive with the user configuration files.
Find the user for whom you want to export configuration, and click on the Configuration archive link.
If you haven’t already download the OpenVPN client, download and install OpenVPN Client with GUI from Here
Now open the Configuration Archive and extract the files in this location on the machine from which you are going to establish the VPN connection.
C:\Program Files\OpenVPN\config\
You should be able to successfully connect to your VPN from outside.
The management of users and certificate is much easier in pfSense 2.0. You don’t have to keep a Certificate Authority on separate box, and the discomfort with transferring the CRLs is gone. The utility that generates bundles with the required certificates and configuration for each user automate most of the tedious manual work from the previous version.
As a bonus I have recorded the process of configuration, you can check it out here:
No comments:
Post a Comment