- Create virtualenv with no site packages
- virtualenv mphoria-env --no-site-packages
- Use the virtualenv with
- source mphoria-env/bin/activate
- Checkout latest version of code
- svn checkout https://mphoria.svn.
beanstalkapp.com/src/ mphoriacatalog/trunk mphoriacatalog
- Install preqs
- CouchDB
- Memcache
- Nginx
- Install required modules using pip
- cd mphoriacatalog; pip install -r requirements.txt
- Initialize couchdb’s databases
- cd ..;cd couchdb-init;python create_couchdbs.py
- Install couchapp utility (this will help up push our defined views onto couchdb)
- pip install couchapp
- Push all backed up views to couchdb
- couchapp push emailpasswds http://127.0.0.1:5984/catalog_
users - couchapp push meta http://127.0.0.1:5984/
searchmeta_users - cd productsmeta_user/; couchapp push meta http://127.0.0.1:5984/pro
ductmeta_users
- Update the domain of the app that we will running this off from (this is to avoid redirect issues)
- In settings.py under INSTALLED_APPS add 'django.contrib.admin',
INSTALLED_APPS = ( 'django.contrib.auth', 'django.contrib.contenttypes', 'django.contrib.sessions', 'django.contrib.sites', 'django.contrib.messages', 'django.contrib.staticfiles', 'django.contrib.admin', 'frontend', ) |
- Under urls.py make sure the follwing lines are uncommented or exits
from django.contrib import admin admin.autodiscover() urlpatterns = patterns('', url(r'^admin/', include(admin.site.urls)), |
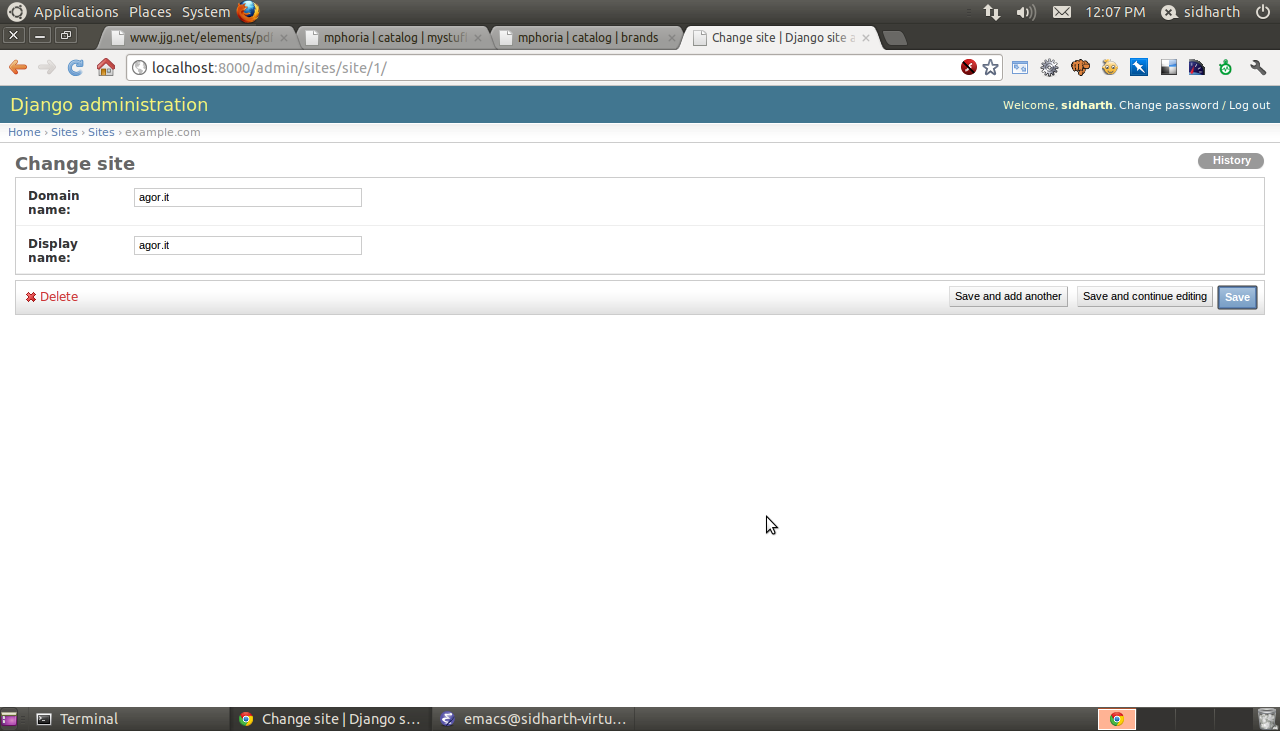
- Run python manage.py syncdb. Its going to start command prompt to create admin user name, which we’re going to use later to to change site name
- Run python manage.py runserver 0.0.0.0:8000, log on to server with right IP:8000
- Enter credentials that we just created.
- Click on Sites, example.com and change it to desired values. In this case agor.it
- Comment out the line in settings.py and urls.py that we used to create admin interface.
 |
- Update Nginx’s config
- In our project directory we have nginx’s desired config. Within server blog we need to add following. Make sure you replace root with right direcotry of your deployment as highlighted below
location = /_.gif { empty_gif; } location /static/ { autoindex on; root /home/sidharth/Code/odesk/ } # your standard Nginx config for your site here... location / { proxy_pass http://localhost:8000; proxy_set_header X-Real-IP $remote_addr; } |
- After this run our django application using gunicorn
- cd mphoriacatalog; ~/mphoria-env/bin/gunicorn_
django -w4
Alternatively as phase 2 of installation we can use supervisord that will restart unicorn automatically if required
- Supervisor is already installed when we did pip install -r requirements.txt
- Copy supervisord.conf from our home directory to /etc
- Check our config using supervisord -c /etc/supervisord.conf
- If needed modify the config (Hint: Change paths that are highlighted in bold below)
[inet_http_server] ; inet (TCP) server setings port=127.0.0.1:9001 ; (ip_address:port specifier, *:port for all iface) [supervisord] logfile=/home/sidharth/logs/ logfile_maxbytes=20MB ; (max main logfile bytes b4 rotation;default 50MB) logfile_backups=4 ; (num of main logfile rotation backups;default 10) loglevel=debug ; (log level;default info; others: debug,warn,trace) pidfile=/home/sidharth/ nodaemon=false ; (start in foreground if true;default false) minfds=1024 ; (min. avail startup file descriptors;default 1024) minprocs=200 ; (min. avail process descriptors;default 200) [rpcinterface:supervisor] supervisor.rpcinterface_ [supervisorctl] serverurl=http://127.0.0.1: [program:mphoriacatalog] directory = /home/sidharth/Code/latest/ user = sidharth command = /home/sidharth/Code/latest/ |
- You may also need to modify paths in start-django.sh files that contains command/params for our gunicon_django process (Hint: Change paths that are highlighted in bold below)
#!/bin/bash set -e LOGFILE=/home/sidharth/logs/ LOGDIR=$(dirname $LOGFILE) NUM_WORKERS=3 # user/group to run as USER=sidharth GROUP=sidharth source ~/Code/mphoriacatalog/bin/ test -d $LOGDIR || mkdir -p $LOGDIR exec gunicorn_django -b 0.0.0.0:8000 -w $NUM_WORKERS \ --user=$USER --group=$GROUP --log-level=debug \ --log-file=$LOGFILE 2>>$LOGFILE |
- Start our supervisor process using
- supervisorctl
- if mphoriacatalog seems not to be running, use start all
- Upon successful execution you can log on to http://localhost:9001 and see web interface like following

No comments:
Post a Comment